STAY INSPIRED! GET THE LATEST TIPS, TRENDS, AND EXCLUSIVES DELIVERED STRAIGHT TO YOU.
Chapter 8: DIY Duron Ranch Projects
Shopping and Building on a budget
Welcome back y’all!!! 🤠 I’m ready to share some more of my story.
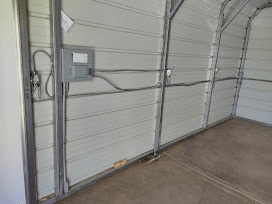
Derrick and Corbin are very efficient. The new breaker box is installed and wires are now flowing up and around the shop interior.

It is coming along real good. Again, Derrick and Corbin make it look real easy. Question from Derrick, “I understand you want the light switch on the left side, looking into the office?” I replied, “yes Sir”. I was stunned just for a moment and had to ask myself. “Am I wrong?”...🤔 As we were looking at the door frame from the outside, when the door is installed, the “door knob” is going to be on the LEFT. Hmmmm🤔 “Sometimes, you just gotta wonder”. Check out my Note below on this subject of the door KNOB..
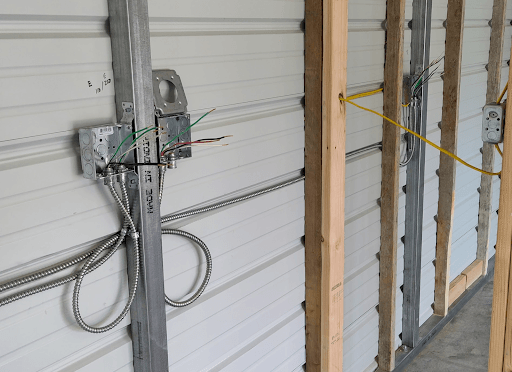
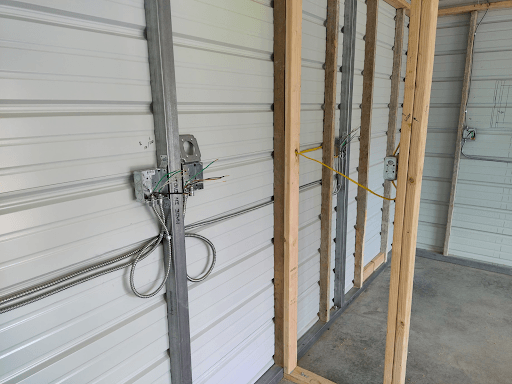
See the yellow wire coming through the stud and attached to the King stud to the right? This picture shows the change I made after I decided on a “Right hand door”. NOTE: Do y’all know how to determine the difference between a right handed door and a left handed door? If you look it up, different people have different ways to determine the difference.
My Answer: Depending on your choice of which way you want the door to swing. If it opens and swings to the “inside” of the room, close the door with yourself inside the room. Face the door, left hand to the hinges and your right hand to the knob. It’s a right-handed door. 🤠 It is funny, I really thought hard about the door swing. I wanted the door swing to go INTO the office. That is why I made the light switch change. Who wants to go into a room and the light switch is behind the door? Not me. 🤠
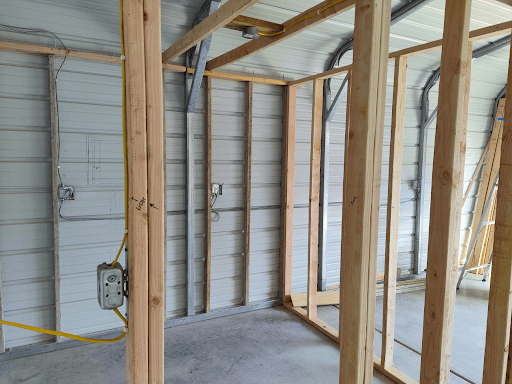
If y’all look closely at these two pictures, y’all should be able to see some sketch marks on the far wall. Yep, with this West Texas HEAT, I decided to put in an A/C window unit. I measured once and I measured twice. I probably measured more times than that.🤣 I will have to cut through the metal wall with my Ryobi Angle Grinder from Home Depot (fyi, I have an older RYOBI 5.5 Amp 4-½ in. Angle Grinder, pretty inexpensive) and place a wooden window frame at that wall. Remember what I say, “measure twice, cut once.” Yes, I know myself, I’m sure that I personally, always measure more than twice. It's tough making mistakes. It can cost a lot of time AND MONEY. Y’all know how much it “thrills me” to waste time and MONEY. 😡😅
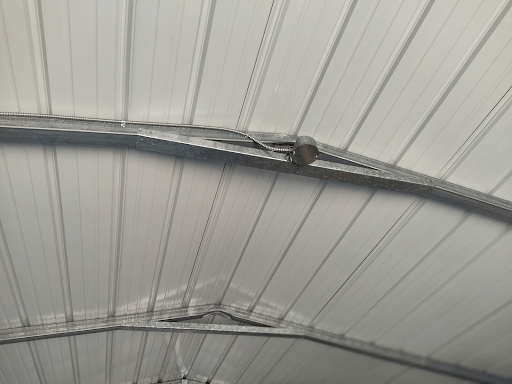
The next picture below, y’all can see at the top of the picture, the yellow electric wire heading to the light fixture on the ceiling. I’m sure I mentioned it before.🤔 This fixture and build can handle a ceiling fan with a light. The same when y’all see the ceiling fixture at the center of the Shop itself. I plan to place a light fixture there, but will place a ceiling fan there also, sometime in the future.🤠
NOTE: Just fyi. I would like to mention that y’all need to let your electricians know how thick of sheet rock / dry wall, plywood or paneling y’all intend to use. They will place the wall and ceiling gang boxes specific to the thickness of your wall and ceiling plan. Trust me, I told my guys ¼ inch and I purchased a 1/2 inch dry wall. 😞 Not their fault, mine and mine only. I had to buy “wall plate extenders”, just for the “Office” walls and ceiling. My bad! Live and learn. 😞🤠
I have already made my Home Depot purchase on all the items I was going to need to finish the outlets and the plates like we planned. two outlet box lamp holders , one range / dryer wall plate , eight 2-gang duplex outlet wall plate , two 1 gang toggle plastic wall plate , two 1 15amp single pole toggle light switch and sixteen 1 15 amp outlet receptacle . The three prong dryer outlet, I had an extra. No purchase necessary. Oops, I forgot, I’ll need to go purchase three wall plate “extenders” for the office. My bad. 😞
Today I will buy the “Kraken Foam Insulation” through Amazon. Find Kraken here. Make sure to purchase the “Closed Cell”. There are other spray foams out there, but I tend to believe in the KRAKEN. 🤠The Office area will be insulated 100%. All four walls, Up and down. The rest of the Shop, I will only spray the ceiling and down about two feet. To explain better., the height of my Office walls, starting from the corner, going around the entire building. Pretty much 8 feet from the floor. The ceiling to roof insulation is my main concern. Kraken is expensive, so this is just one of my budget cuts. 🤠
My 10 foot ladder is gonna come in handy. 🤠 This light outlet is in the center of the entire shop. I will place one of those lamp holders in there for now, with a bright bulb.🤠 The ceiling fan will come later. Why LATER?, y’all may ask. No worries, I’ll cover that story later. 🤠
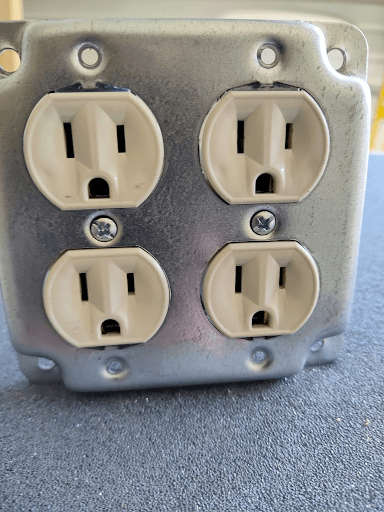
Eight wall plates for eight gang boxes to house sixteen outlets.

Two light switches. One for the side door entrance to the shop and one for the office.
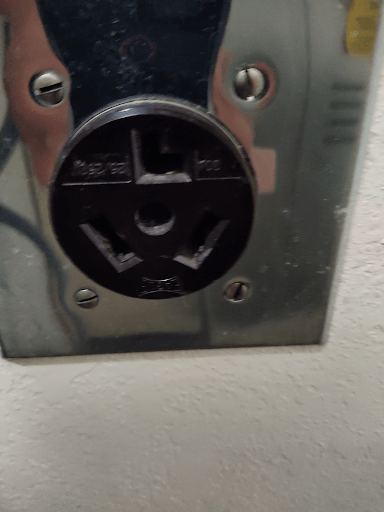
A 3 prong Dryer outlet (NEMA 10-30R) and plate. This is for an older model dryer which I have available to me for FREE.🤣 The newer models call for a 4 prong (NEMA 14-30R) Improved Safety feature update around 1996. Just fyi, If you need to change out the dryer CORD to match the wall outlet, please read the safety information on the back panel of the dryer. Remember, Safety First! Also, Derrick and Corbin follow the National Electric Code. If I ever replace my old dryer with a NEW one, the per code wiring in this gang box will allow easy installation of the new 4 prong (NEMA 14-30R) outlet. 👍🤠
I think I have now done enough damage for one day. 🤠🤣
Please don’t forget to click on my LINKS to save time and MONEY. Tap the LIKE button👍, send feedback, ask questions and definitely SUBSCRIBE, by entering your email at the home page, to receive notice of every new Chapter at the DURON RANCH. Until next time, stay safe, make good choices and we’ll see y’all soon!!! 🤠


WHAT TO READ NEXT
STAY INSPIRED!
GET THE LATEST LIFESTYLE TIPS, TRENDS, AND EXCLUSIVE CONTENT DELIVERED STRAIGHT TO YOU.


COPYRIGHT © 2025 DURON RANCH. ALL RIGHTS RESERVED.